
It can be difficult to run a shell script on macOS. However, if you remember a few fundamentals, the job becomes much easier. So, here’s how to easily run a shell script on a Mac.
Do you know How to Transfer iMovie from iPhone to Mac?
Run Shell Script on Mac
Permissions
When running a shell script on macOS, permission is the most critical aspect to remember. Essentially, you, the user, should be able to run the script. It may seem strange, but you do not have permission to run the script anywhere on the system by default. Due to security concerns, it has been disabled.
This approach can be bypassed in three ways:
- Make a copy of the script in your home directory.
- As a sudo user, run the script.
- Make sure the script has enough permissions.
We’ll skip the first option because it may conflict with the script’s functionality. The second method is to utilize the sudo user to run the script. You’re giving the script one-time administrator permission to run this way. It does not necessitate any kind of setup. You just need to provide your admin password each time the script is invoked. This is the way I recommend, and if you want to give it a shot, go to the next step.
Giving oneself permission to run the script is the third method. You can use this method to run the script several times without having to use the sudo command or enter a password. Use the following command to grant yourself permission to execute:
Sudo chmod u+x /script-location/
1. Easy way
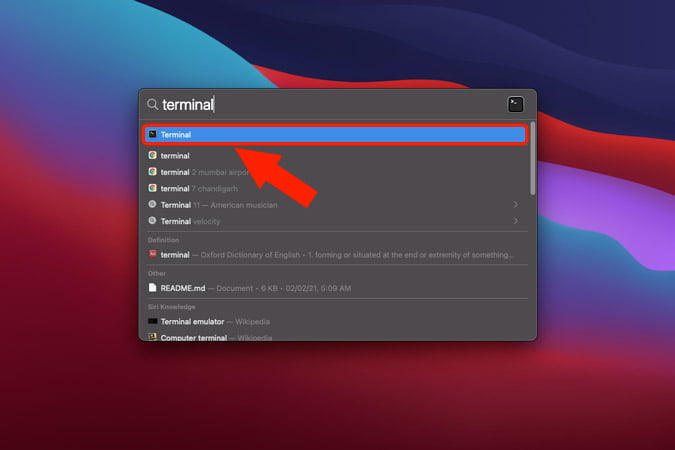
1. The sudo command is the simplest way to run a shell script on a Mac. To do so, press Cmd+Space on your keyboard and type Terminal into the Spotlight. Press Enter when the results show.
2. Type “sudo sh” in the terminal.

3. Then, launch Finder. Locate the shell script in the Finder window and drag and drop it to the terminal. The script will be located in the terminal. Now press the Enter key.

4. The admin password will be requested by the terminal. Enter it and then press Enter once more.
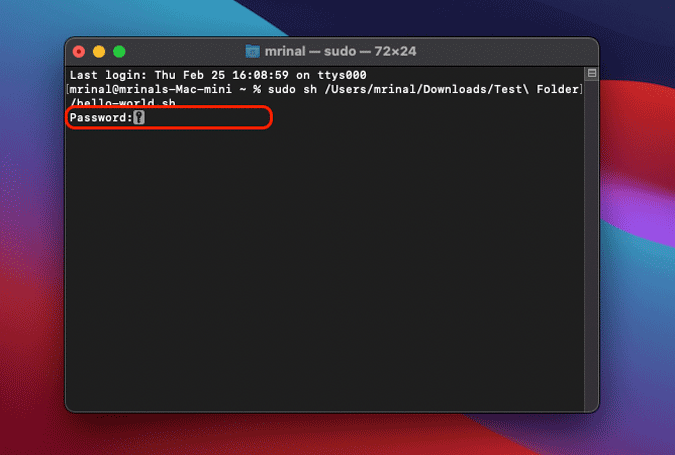
5. The script should operate without a hitch.

If your script fails with the error “Permission Denied,” go to this step and grant the necessary permissions, then try again.
2. Third-party App
If you run shell scripts regularly, it’s advisable to use third-party software. It will allow you to edit the script on the fly while also allowing you to run it easily. For Mac, there are other shell script editors, but I prefer Sublime Text. It’s a simple markup editor that works with a variety of languages. However, for the purposes of this demonstration, we’ll stick to shell scripts.
1. First and foremost, get Sublime Text and install it.
Download Submit Text for macOS.

2. Then, in Finder, open the shell script. Select Open With from the context menu when you right-click on it. Select Sublime Text from the expanded menu.

3. Select Tools from the top menu once the shell script has opened in Sublime Text. Select Build from the dropdown menu.
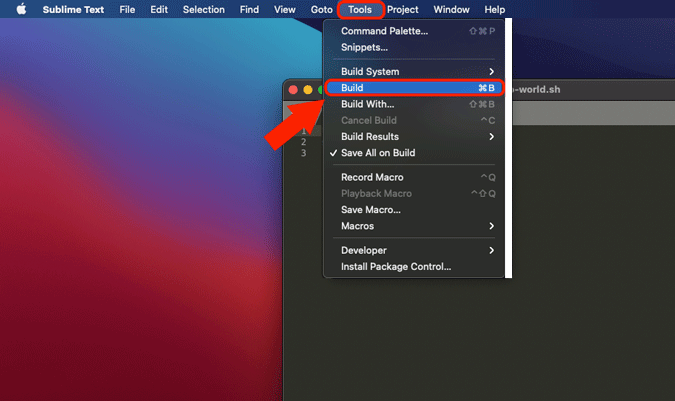
4. When Sublime Text asks for permissions, select Allow. The result will then be displayed on the bottom split screen.
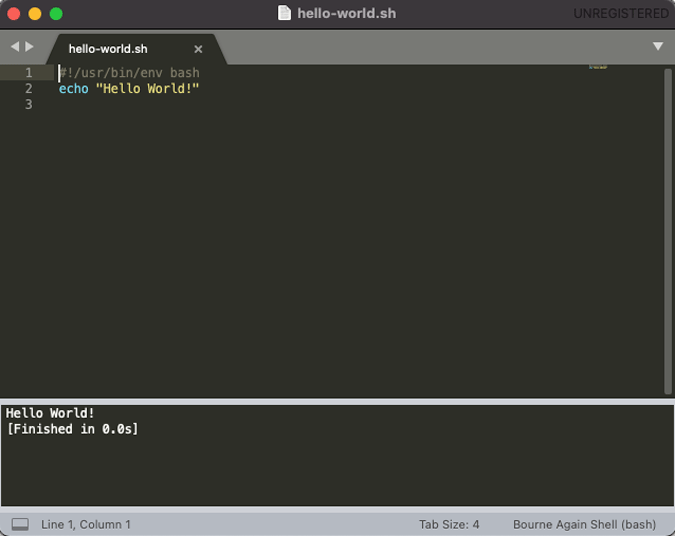
Sublime allows you to edit and save shell scripts, as well as quickly build them.
Final Remarks: Run Shell Script on Mac
So those were the two ways to run a shell script quickly in macOS. It’s better to have a third-party program if you frequently edit and deal with shell scripts. When it comes to shell scripts, the macOS terminal is not straightforward.
1 thought on “How to Run Shell Script on Mac”